Deploy Django Application to Heroku

I am a software developer with specialization on backend development.
Hello, We have successfully completed our CRUD Django website which we have pushed to the GitHub repository but it can only be used locally on our system and it's time for us to show the world what we have created by hosting our website on Heroku. Firstly, we need to configure our website to run successfully on Heroku by following the steps below
- Firstly, Create a Procfile in the base directory which has a manage.py file and put the code below in it.
web: gunicorn my_first_models.wsgi --log-file -
my_first_models used above is the project name
- Secondly, Add the following in the settings.py file as stated below
#Add to the top of the settings.py file
import dj_database_url
import os

#Add after the definition of the database in settings.py file
db_from_env = dj_database_url.config(conn_max_age=500)
DATABASES['default'].update(db_from_env)
Thirdly, We need to tell Heroku which dependencies to install by putting them in a requirements.txt which we will generate automatically based on the installed dependencies. So before we generate the requirements.txt file let's Install the other dependencies needed by Heroku to serve our application.
Install Gunicorn which will be used as a web server for our application
  #Ensure the virtual environment is activated
  pip install gunicorn
Install dj-database-url : This is needed since Heroku uses environment variables for our database and other add-ons. dj-database-url is a utility to help us load our database into our dictionary from the DATABASE_URL environment variable.
  #Ensure the virtual environment is activated
  pip install dj-database-url
Install psycopg2-binary to be used as the database engine.
  #Ensure the virtual environment is activated
  pip install psycopg2-binary
Install white noise: This will be used to serve static files if we have any to serve. Static files like images, CSS files, javascript files etc.
      #Ensure the virtual environment is activated
      pip install whitenoise
Now, let's create the requirements.txt file by running the command
  pip3 freeze > requirements.txt

  #if you are using pipenv
  pipenv lock -r > requirements.txt
- Fourthly, Set the secret key as done in the post and also set Debug in the settings.py file to False.
Since our Debug is now False we need to specify the 404 error handler and 505 error handler by going to the project's urls.py file and adding the lines of code below before the URL patterns definition
handler404 = 'first_model.views.view_404'
handler500 = 'first_model.views.view_500'
So we will now add the lines below to the views.py of our application
 def view_404(request, exception):
     return render(request, '404.html')
 def view_500(request):
     return render(request, '500.html')
Lastly, we will create a 404.html file and a 500.html file and add the lines of codes below respectively
<!DOCTYPE html>
<html lang="en">
<head>
    <meta charset="UTF-8">
    <meta http-equiv="X-UA-Compatible" content="IE=edge">
    <meta name="viewport" content="width=device-width, initial-scale=1.0">
    <title>404 Error</title>
</head>
<body>
    System Error 404. Page not found.
</body>
</html>
<!DOCTYPE html>
<html lang="en">
<head>
    <meta charset="UTF-8">
    <meta http-equiv="X-UA-Compatible" content="IE=edge">
    <meta name="viewport" content="width=device-width, initial-scale=1.0">
    <title>500 Error</title>
</head>
<body>
    System Error 500. please contact the admin!!!!
</body>
</html>
- Fifthly, let's tell Heroku which version of Python to install and use for our projects. Create a runtime.txt file in the manage.py directory and add the line below
python-3.9.1
- Sixthly, let's set our static files in the settings.py file as shown below
#Add the lines to settings.py file
STATIC_URL = '/static/'
STATICFILES_DIRS = [BASE_DIR / 'static']
- Lastly, Save all files and push them to Github.
Deploy on Heroku
Go to heroku to open an account and create an app for our website. Then on the app page navigate to the deploy tab as shown below
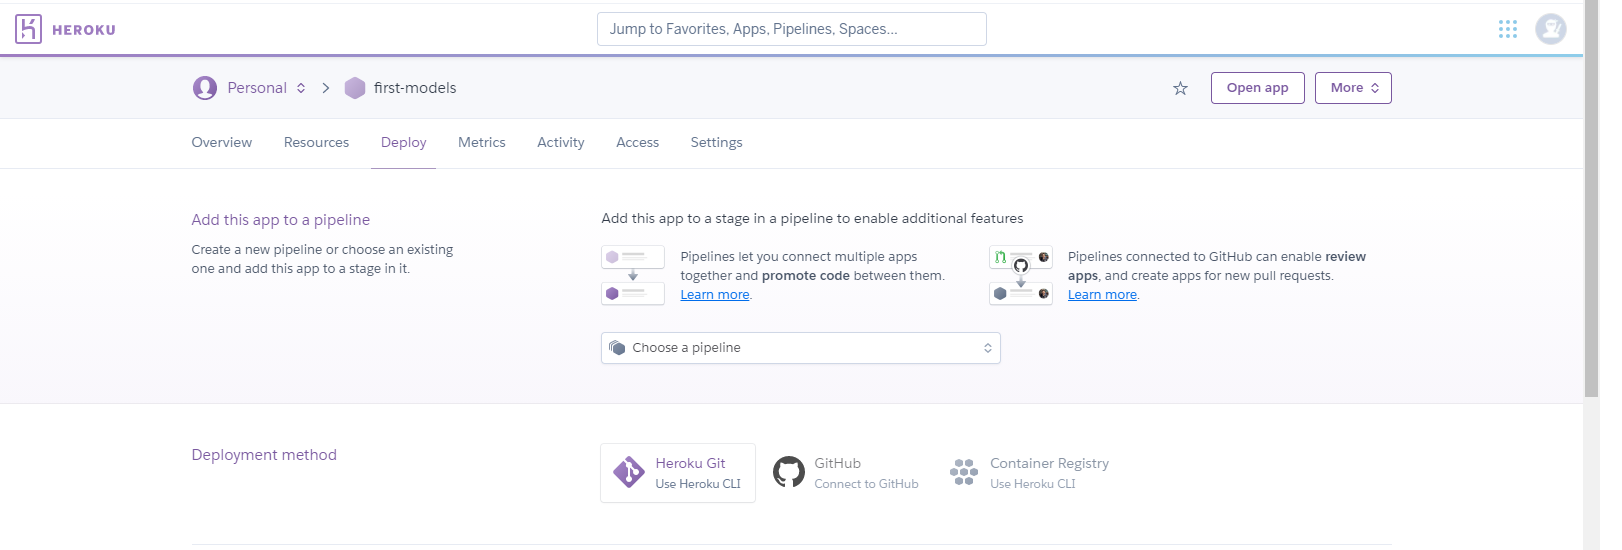
Now go to the deployment method choose GitHub and connect with the repository of our project. With a successful connection, you should now have additional sections added where you will see the automatic and manual deployment. I will go with manual deployment so I click on the deploy branch button.
Note: Don't forget to run migrate on Heroku by locating the console and type in python manage.py migrate
So check out the website search student Add student and student_list . See you later....


