Create Django Application

I am a software developer with specialization on backend development.
Welcome developer, In this article, we will now go to Django and see how to create our first Django projects and application
Create Django Project and Application
To create a Django project we will use a virtual environment that will enable us to have a separate environment like a box where every project dependency for our project will be installed and it will be separated from another project and with this, we won't have dependencies clash. To create a project in Django follow the steps below
Create a folder with any name ( I will name mine Django models )
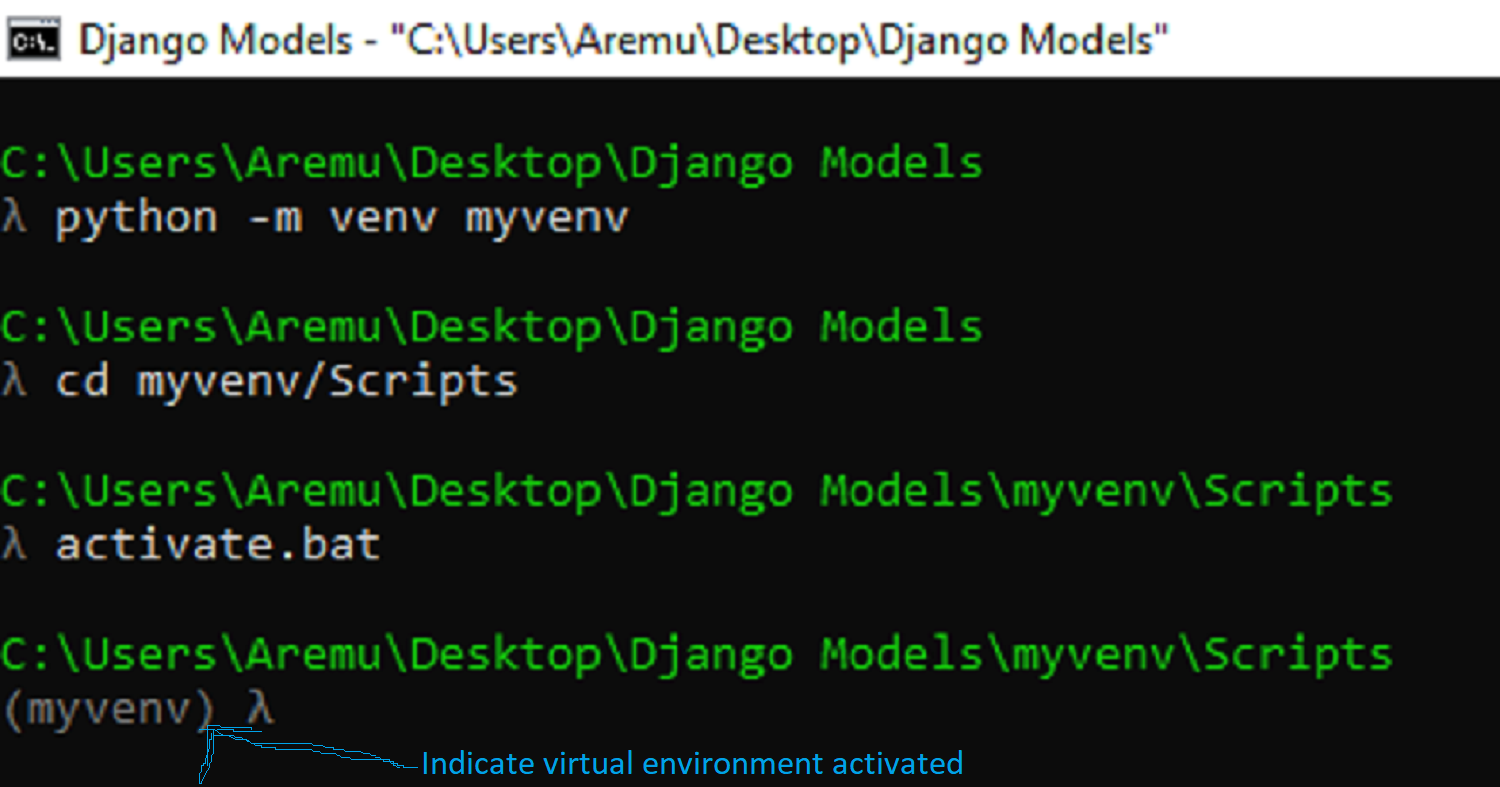
Open the created folder in the terminal and run the code below to create the virtual environment
# I am assuming you have python installed and it can be run from the terminal

python -m venv myvenv

# myvenv is our virtual environment name and you can change it
To set up Python visit python website to download and during installation ensure it is added to the path to be run from terminal
- Now with the virtual environment set up, we need to activate it for us to work with it
#Navigate to the scripts folder below with the command
cd myvenv/Scripts

#Now run
activate.bat
# or
activate
So you should have the virtual environment activated and your terminal should be like mine below
We are going to install all project dependencies inside the activated virtual environment so whenever you want to work on the project ensure you have the virtual environment activated the project won't have access to those installed packages.
- This is the right time to install Django
# install Django with pip
pip install django

#check Django version and some other information
pip show django
Now we can create our Django project with the command below
Ensure you are now in the first folder we created in the beginning( check the next screenshot below)
django-admin startproject my_first_models
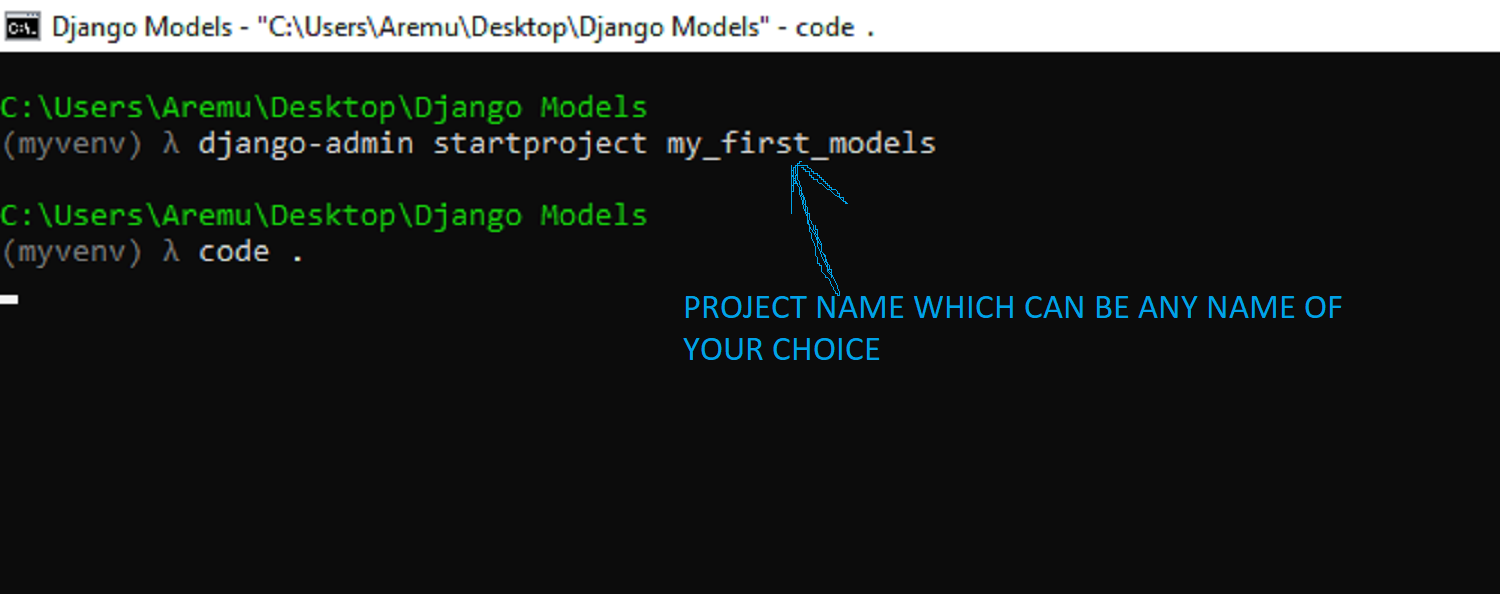
The code above created a folder in the current directory with some pre-defined Python files and to go through them, open the folder in any text editor and you should have something like
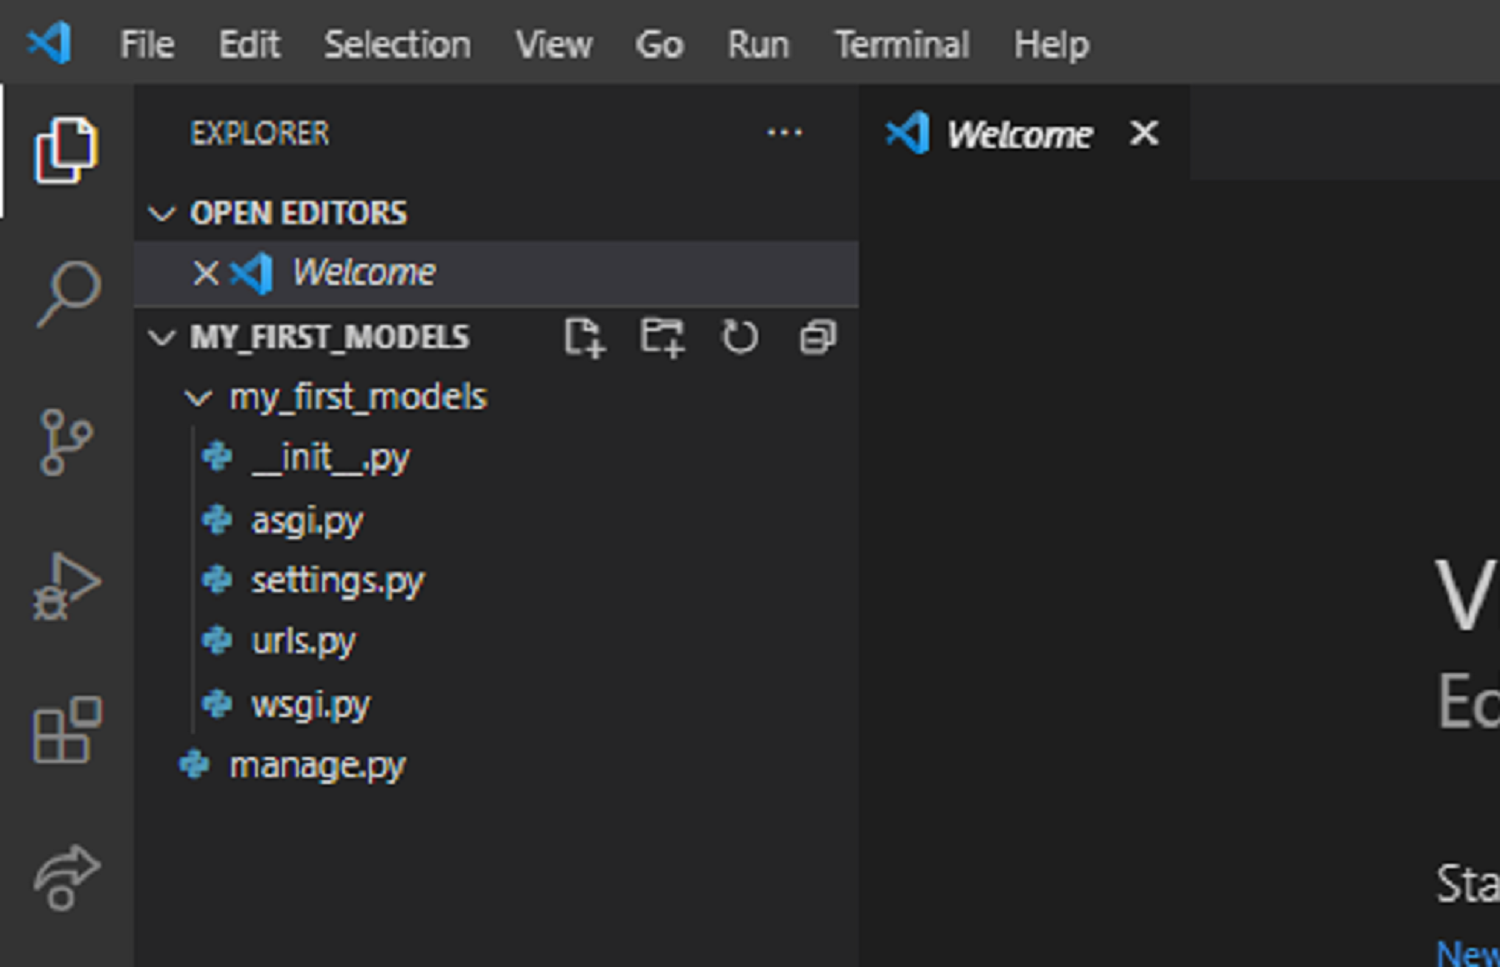
init.py file is to tell Python to treat the current directory as a package directory
asgi.py and wsgi.py files are the files holding Python server definitions for both asynchronous and synchronous serving.
Settings.py file is the file that contains all the configurations for your Django installation. This file also contains declarations needed to be protected from hackers as much as possible. This file is very important.
Urls.py file is the file that holds the route definitions for our apps i.e here we define the addresses and their corresponding view function to render. This is the only URL file Django recognized based on the configuration in the settings.py file and thus any other URL file will be attached to this file with the use of the "include" function
manage.py file is that file that enables us to interact with the Django project in many defined ways which we will see very soon.
To see that our project is working perfectly run the following code in the terminal with the directory that contains the manage.py file
python manage.py runserver
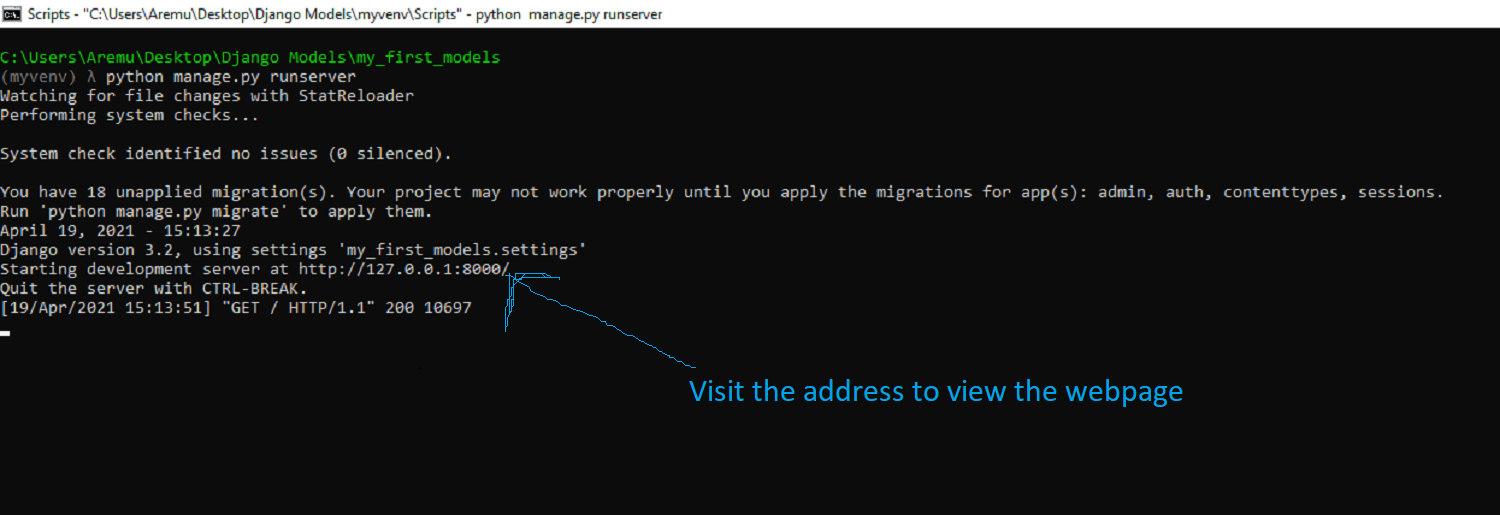
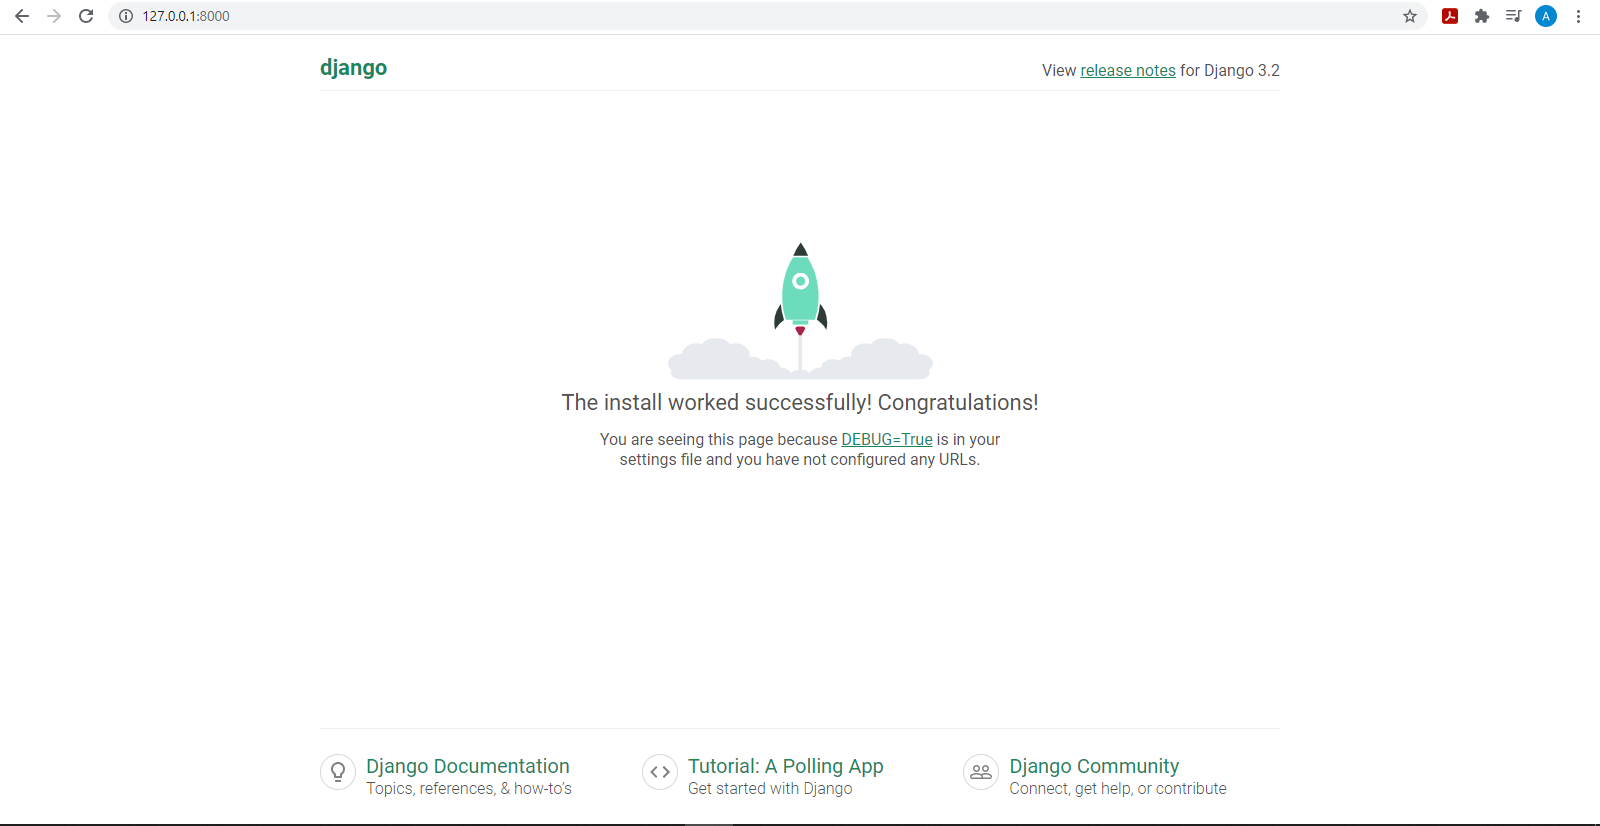
👍 Congratulations, your project is working perfectly.
With that done, let's now create a Django application, See applications as sections of your website, let's say we are working on an e-commerce website, we can have sections for products, orders, payments, accounts, etc. and so each section will stand alone and also interact with other sections which make our code to be clean, efficient and also make debugging easy. Now let's create our first app
- Go to the directory which contains the manage.py file in the terminal and run the code below
python manage.py startapp first_model
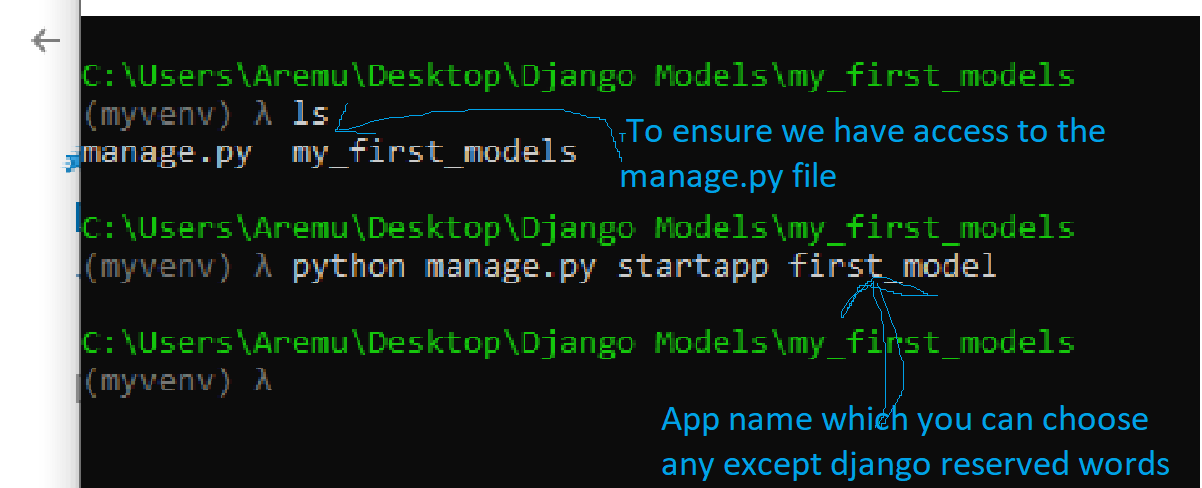
check your project folder, a new folder with the application name must have been created some predefined Python files
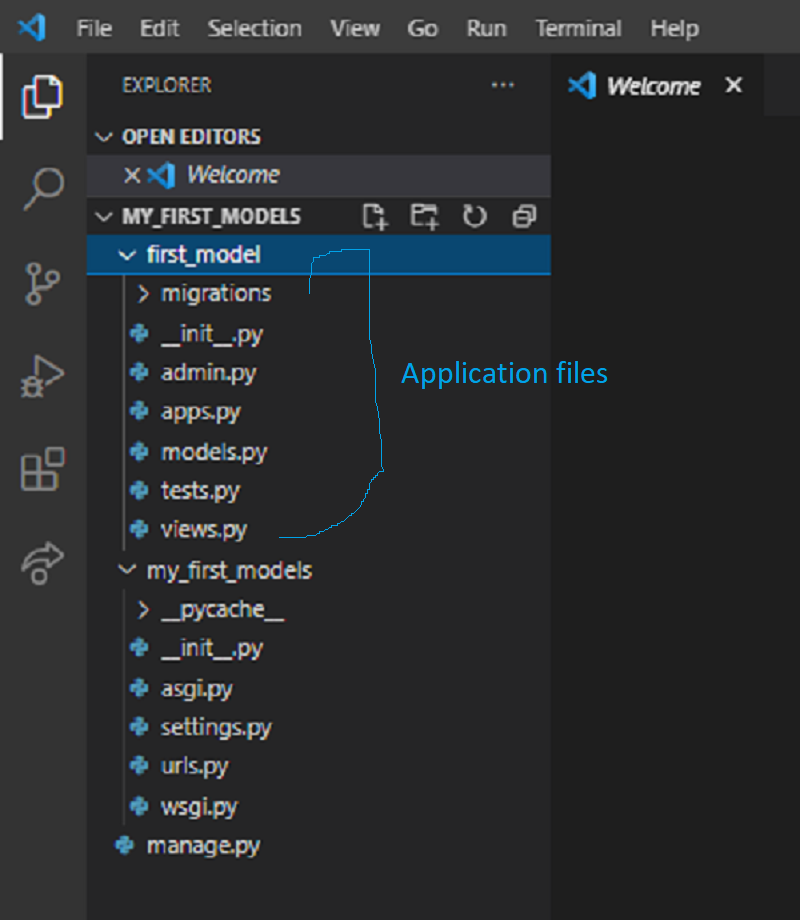
from the application folder, we have these files
init.py file: This file is to tell Python to treat the directory as a package
admin.py file: This file is where models that need to be displayed in the admin panel are stated and customized.
apps.py: This is the application configuration file with the app name to use in the settings installed app list.
models.py file: This file is where the models( database ) are defined for Django to create in the database we are using.
tests.py file: This file is where the application testing procedures definitions are defined.
views.py: This file holds the views i.e business logic for the application either function-based views or class-based views
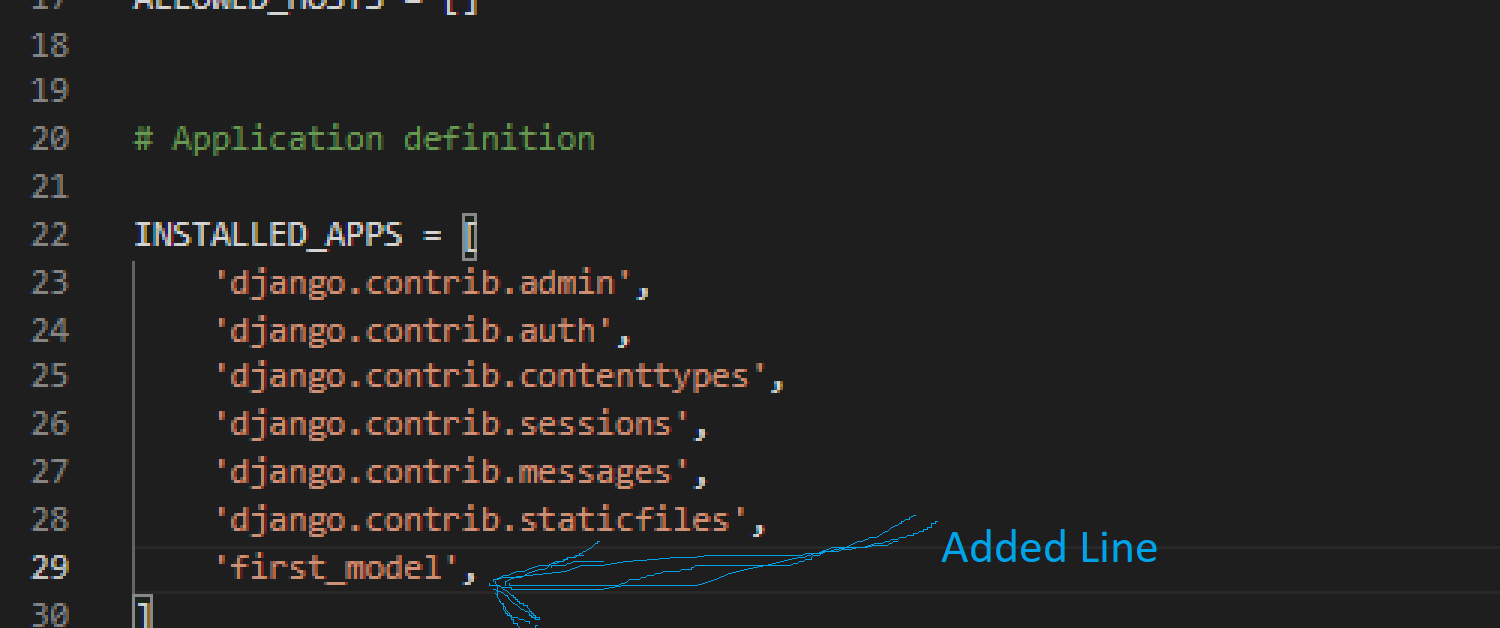
Okay, let us now confirm if our application is working perfectly. To do this, follow the steps below
- In the settings.py file locate installed_apps and add our app name to the list of apps installed
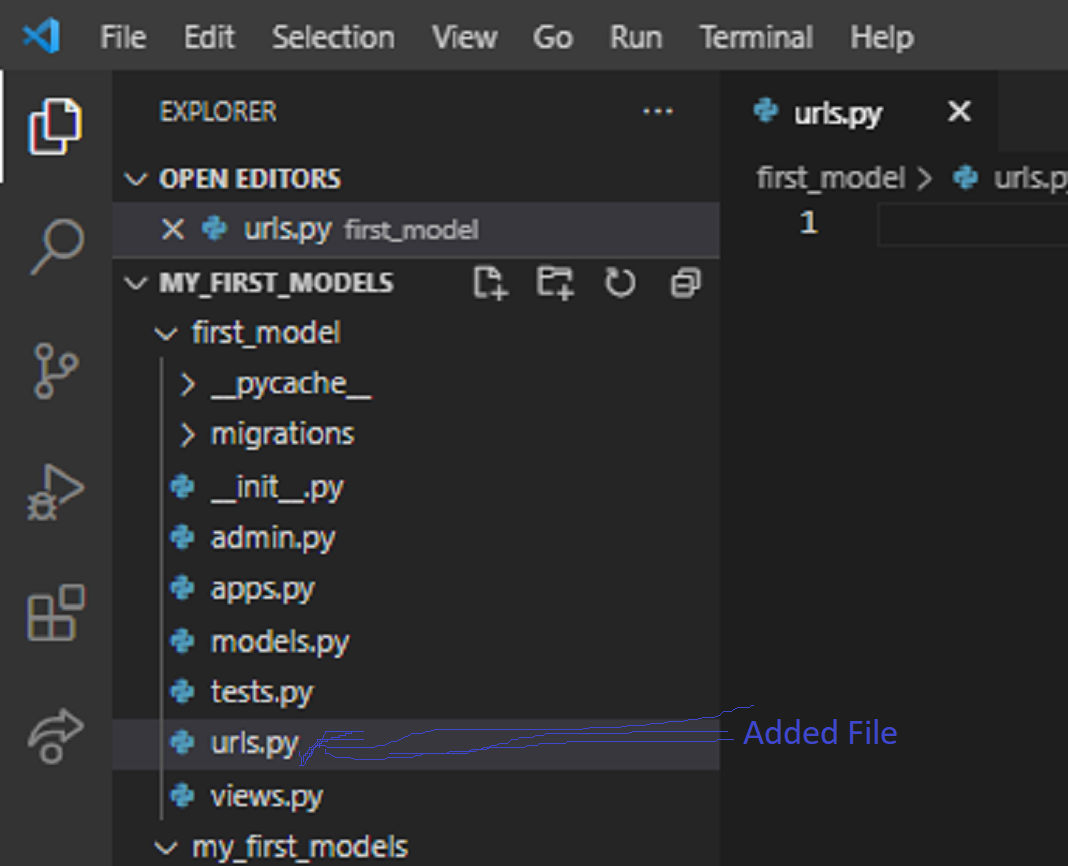
- Add urls.py file to the files in the application folder as shown below
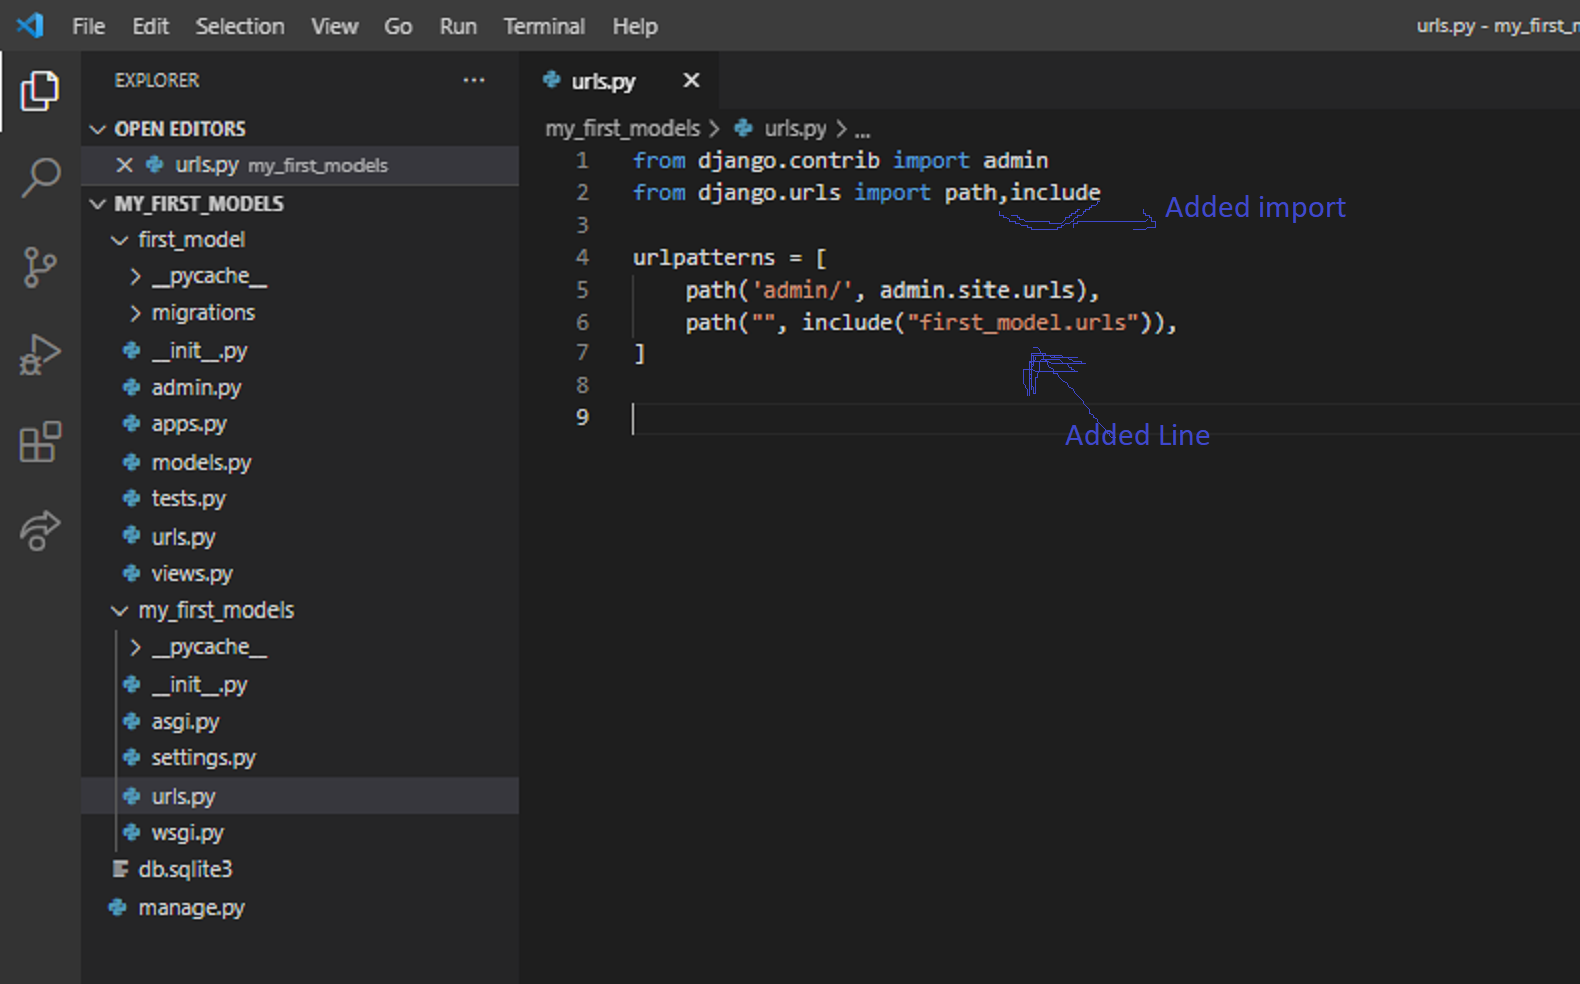
- Add the following line to the urls.py file in the project folder. This will tell Django to update the current list with the url patterns defined in the application url.py file.
- Now go to the urls.py file in the application and add the code below
from django.urls import path
from . import views
# from . means from the current directory

urlpatterns = [
    path("greet/", views.home, name = 'home'),
]
- Now create the corresponding views function (home) in the views.py file of the application
from django.shortcuts import render
from django.http import HttpResponse


def home(request):
    return HttpResponse("Hello World, I have created a web app")
- Now as we did for our project above, run the server and see our application in action by visiting the address http://127.0.0.1:8000/greet/
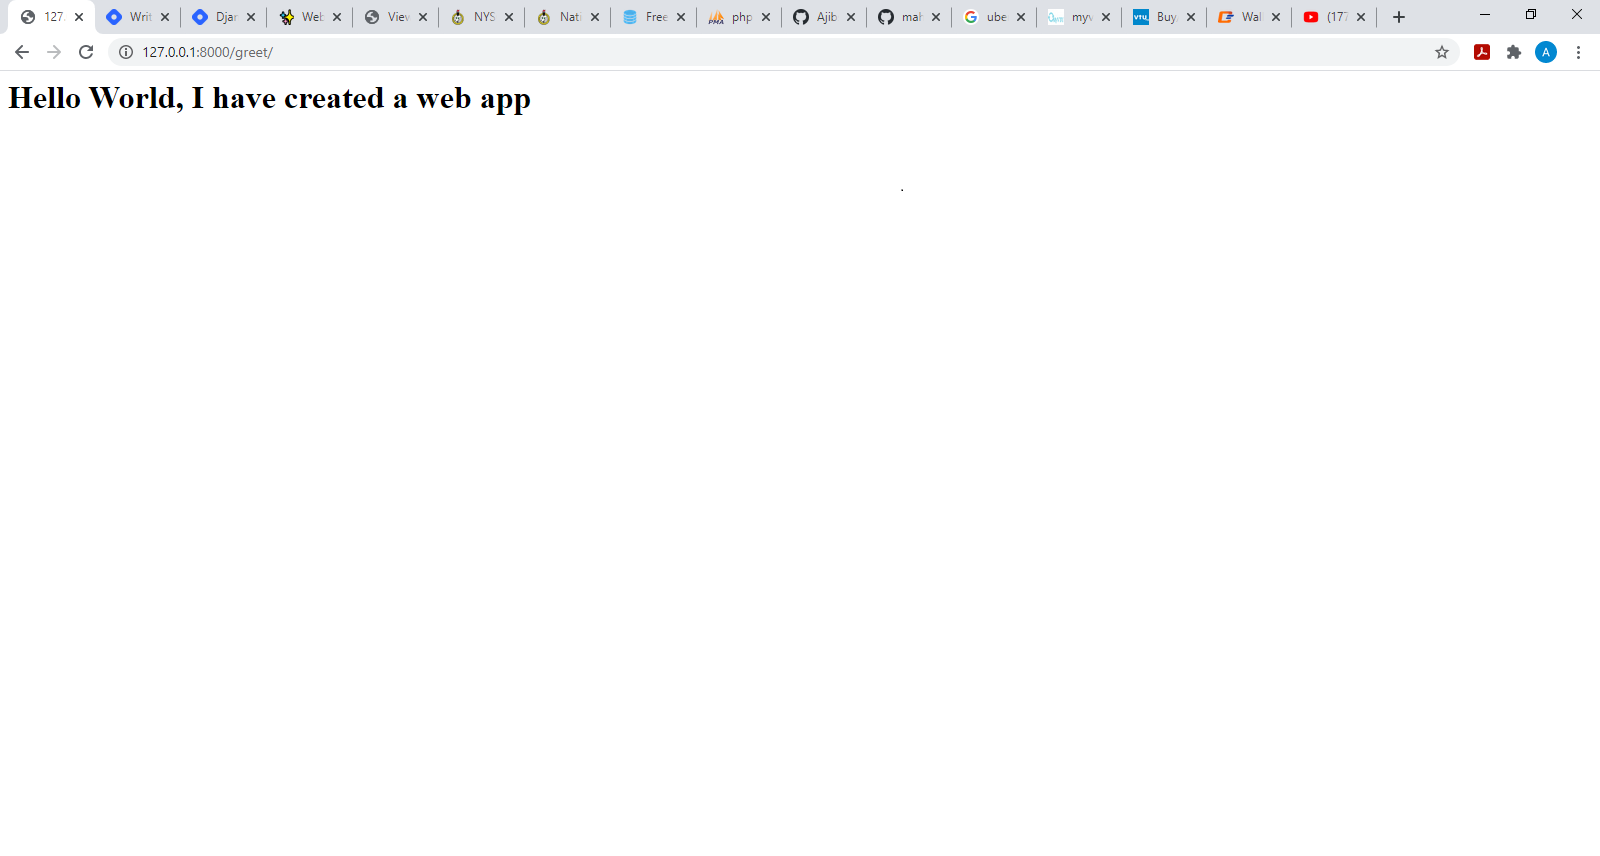
👍 wow, your project and applications are running perfectly. See you later and thank you for reading.


