


Welcome, we have successfully performed CRUD Action with Django and it is time to show our visitors the students we have registered successfully and probably allow them to search for any registered student. In this article, we will
- Fetch all student details from the database and present the result to our visitors.
For the above we won't make use of the API or admin panel to fetch as we did in the last article
Fetch student's details based on the visitor's input search
Allow user to add a new student to the database from the browser
Recall, that our only table in the database has six fields namely: name, grade, level, active, date_admitted, and reg_no. Also, we have populated our table with some data in the last post. Also, don't forget we have routed our project to our application from the project urls.py file to application urls.py.
Recall that we define what is to be passed or fetched from the database in the views.py file and also what is to be passed to the HTML file to be presented to the website visitors i.e views.py and urls.py files are the bridge that connects our database to our HTML file.
Establish users visiting address
According to Django Architecture, We will need an address that the browser will use to communicate with a Django-running server. Simply paste the code below in the urls.py in the application folder
from django.urls import path
from .views import student_views

urlpatterns = [
        path('student_list', student_views, name = "student_views"),
       ]
The above code simply tells Django to go to the views.py file and perform the action defined in the student_views function if the address it received from the browser has its subdomain to be /student_list.
So it is time to define what will be done in the student_views function, But before we do that let's simply note down what we need from the database and what we need to pass to the HTML file.
We will need to
Fetch all the student's details at once and send the list to the HTML file
Fetch the requested registered student and send his/her details to the HTML file.
Simply paste the code below in the views.py file in our application folder
from .models import students #line 1

def student_views(request): #Line 3 (Function-based view)
    student_list = students.objects.all() #Line 4
    context = {'student_list':student_list} #Line 5
    return render(request, 'first_model/index.html', context=context) # Line 6
The code above simply does the following
Line 1: import our table from the database for us to query
Line 3: define our function with the name student_views. Recall we have two types of views ( function-based views and class-based views).
Line 4: It queries the student table in the database and selects all populated rows and columns it can find.
Line 5: This creates a key to the value pair, the key will serve as a reference in the HTML file that will point to the student_list we got from the database
Line 6: This tells Django to present to the browser the HTML file named index.html in the first_models folder located in the templates folder.
As of now, we do not have a templates folder, now let's quickly do that
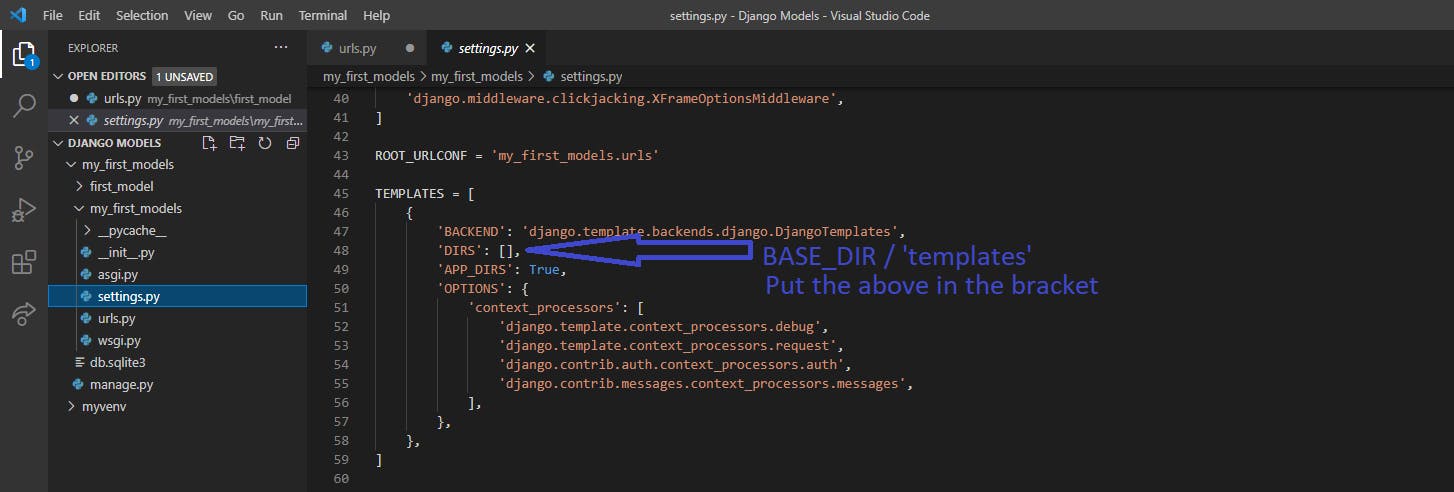
first, go to the base directory (which contains the manage.py file) and create a folder with the name templates.
Second, go to the settings.py file and locate the template definition as shown below. Add BASE_DIR / 'templates' in the empty square bracket.
- create a folder in the templates and name it first_model and then create the index.html file in it. Paste the code below in the index.html file
<!DOCTYPE html>
<html lang="en">
<head>
    <meta charset="UTF-8">
    <meta http-equiv="X-UA-Compatible" content="IE=edge">
    <meta name="viewport" content="width=device-width, initial-scale=1.0">
    <title>Student Database</title>
    <link href="https://cdn.jsdelivr.net/npm/bootstrap@5.0.0-beta3/dist/css/bootstrap.min.css" rel="stylesheet" >
</head>
<body>

    {% block content %}
    <table class="table">
        <thead>
          <tr>
            <th scope="col">#</th>
            <th scope="col">Name</th>
            <th scope="col">Level</th>
            <th scope="col">City</th>
            <th scope="col">Date Admmited</th>
            <th scope="col">Registration Number</th>
            <th scope="col">Active</th>
        </tr>
        </thead>
        <body>
            <!--Loop through the list -->
            {% for student in student_list %}
            <tr>
                <th scope="row">{{student.id}}</th>
                <td>{{student.name}}</td>
                <td>{{student.level}}</td>
                <td>{{student.city}}</td>
                <td>{{student.date_admitted}}</td>
                <td>{{student.reg_no}}</td>
                <td>{{student.active}}</td>
            </tr>
           {% endfor %}
        </tbody>
      </table>
      {% endblock %}
    <script src="https://cdn.jsdelivr.net/npm/bootstrap@5.0.0-beta3/dist/js/bootstrap.bundle.min.js" ></script>
</body>
</html>
The {% block content %} {% endblock %} used above will enable us to reuse the content of the page in another HTML document with just replacing the content within the {% block content %} {% endblock %} Now save all files and then go to your terminal and navigate to the directory that has our project's manage.py file to run the server with the command below
python manage.py runserver
So with the server running successfully, go to the browser and type in the address 127.0.0.1:8000/student_list to give you the result below
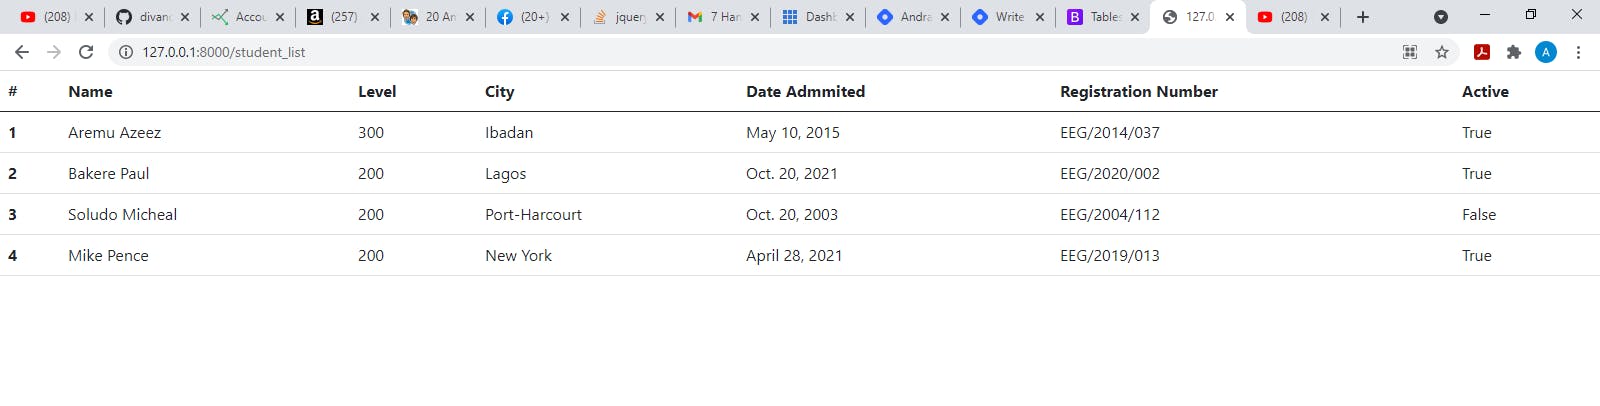
Well done 👍, the First mission was completed successfully. Now to the second mission.
To accept input to be used to fetch specific students from the database, the steps below can be taken
- Create an HTML file named search.html in the first_model folder in our templates. This file will have a form that will allow the visitors to input the student registration number. The form can be of either POST or GET method, since we are only fetching and not adding to the database we will use GET request. Paste the code below in the file.
{% extends 'first_model/index.html' %}

{% block content %}


<div class="container justify-content-center">
    <div class="row mt-5 shadow justify-content-center">
        <form class="col-5 mt-4" method = "GET" action="{% url 'search_student_name' %}">
            <div class="mb-3">
              <label  class="form-label">Student Registration Number</label>
              <input type="text" class="form-control" name="registration_number">

            </div>
            <button type="submit" class="btn btn-block btn-primary mb-4 col-12">Submit</button>
        </form>

        {% if student %}
        <table class="table col-12">
            <thead>
              <tr>
                <th scope="col">Name</th>
                <th scope="col">Level</th>
                <th scope="col">City</th>
                <th scope="col">Date Admmited</th>
                <th scope="col">Registration Number</th>
                <th scope="col">Active</th>
            </tr>
            </thead>
            <tbody>
                <tr>
                    <td>{{student.name}}</td>
                    <td>{{student.level}}</td>
                    <td>{{student.city}}</td>
                    <td>{{student.date_admitted}}</td>
                    <td>{{student.reg_no}}</td>
                    <td>{{student.active}}</td>
                </tr>
            </tbody>
          </table>
        {% elif result_not_found %}
        <label  class="form-label col-12  text-center text-danger text-uppercase">{{result_not_found}}</label>
        {% endif %}
    </div>
</div>

{% endblock %}
- update the application urls.py file with the address below
 from .views import student_views, search_student
 path('student', search_student, name = 'search_student_name'),
- Lastly, update the views.py file with the lines of code below
def search_student(request):

    if request.method == 'GET':
        registration_number = request.GET.get("registration_number")
        try:
            student = students.objects.get(reg_no = registration_number)
            return render(request, 'first_model/search.html', {'student': student})
        except students.DoesNotExist:
            if registration_number:
                result_not_found = f"Student with the registration number {registration_number} does not exist"
                return render(request, 'first_model/search.html', {'result_not_found': result_not_found})
    return render(request, 'first_model/search.html')
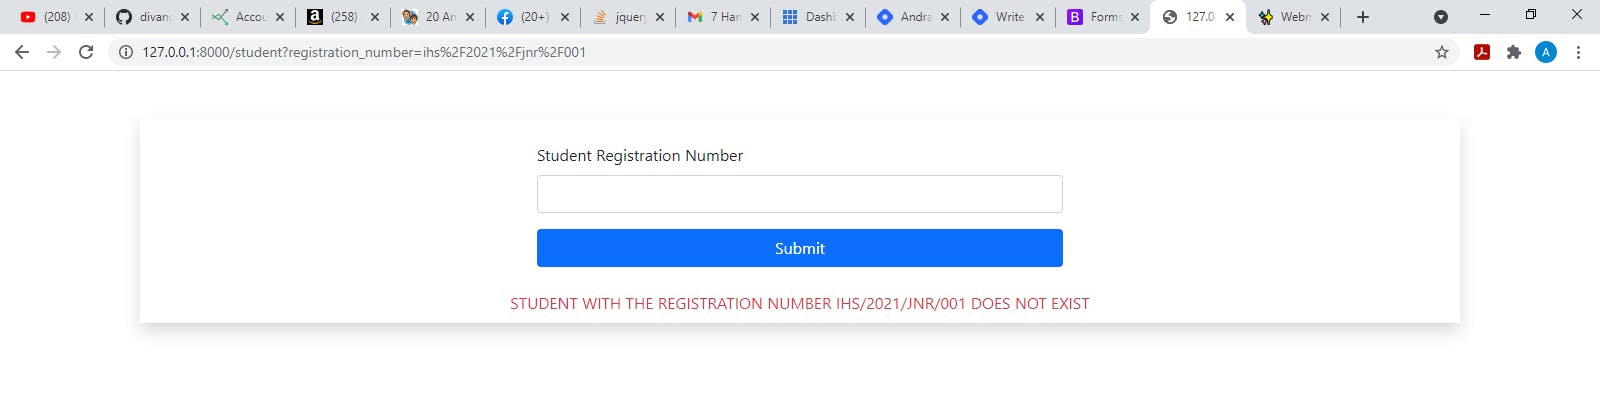
So save all files and then start the server. Navigate to the address 127.0.0.1:8000/student and then input non-existing registration number that is not in the database to see the result below
Also, input the correct registration number in the database and see the result as below
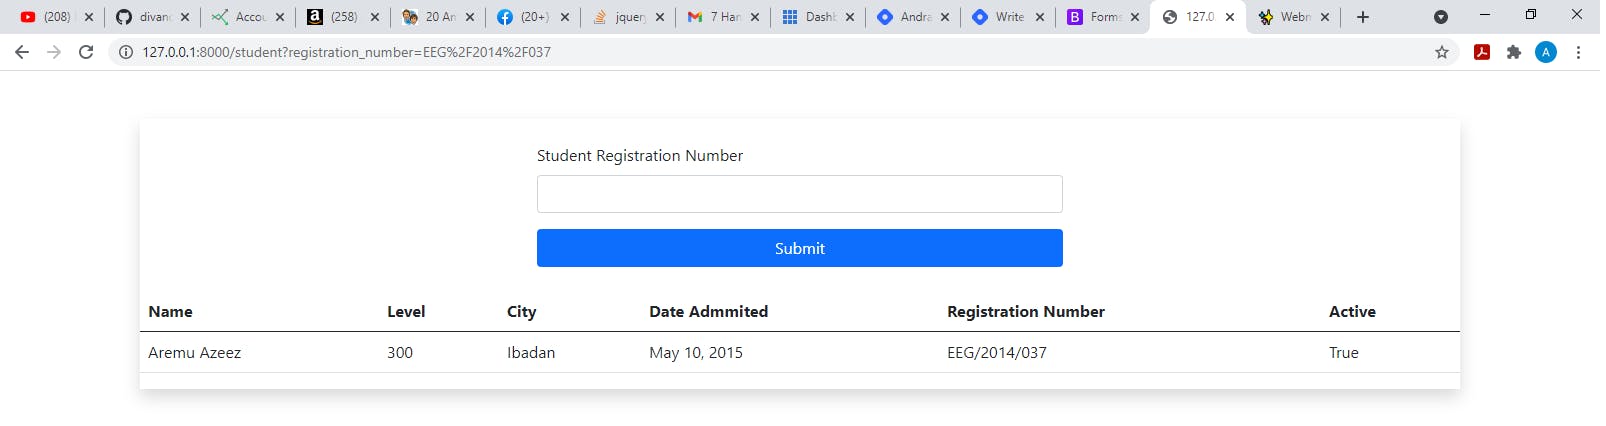
Wow, the second mission completed 👍, Now to the last mission. Create a new HTML file named add_student.html to the first_model folder in the templates. Add the code below in the file
{% extends 'first_model/index.html' %}

{% block content %}


<div class="container justify-content-center">
    <div class="row mt-5 shadow justify-content-center">
        <form class="col-5 mt-4" method = "POST" action="{% url 'add_student_name' %}">
            {% csrf_token %}
            <h2>Add Student</h2>
            <div class="mb-3">
                <label  class="form-label">Name</label>
                <input type="text" class="form-control" name="name">
            </div>

            <div class="mb-3">
                <label  class="form-label">City</label>
                <input type="text" class="form-control" name="city">
            </div>

            <div class="mb-3">
                <label  class="form-label">Level</label>
                <input type="text" class="form-control" name="level">
            </div>

            <div class="mb-3">
                <label  class="form-label">Date Admmitted</label>
                <input type="text" class="form-control" name="date_admitted">
            </div>

            <div class="mb-3">
                <label  class="form-label">Active</label>
                <input type = "checkbox" class="" name="active">
            </div>

            <div class="mb-3">
                <label  class="form-label">Registration Number</label>
                <input type="text" class="form-control" name="reg_no">
            </div>


            <button type="submit" class="btn btn-block btn-primary mb-4 col-12">Submit</button>
        </form>
    </div>
</div>


{% endblock %}
With that done, go to the application urls.py file and update it with the lines below
from .views import student_views, search_student,add_student

#In the urlpatterns list
path('add_student', add_student, name = 'add_student_name'),
Lastly, update the views.py with the code below
def add_student(request):
    if request.method == 'POST':
        name = request.POST.get("name")
        city = request.POST.get("city")
        level = request.POST.get("level")
        date_admitted = request.POST.get('date_admitted')
        active = request.POST.get("active")
        reg_no = request.POST.get('reg_no')

        if active == "on":
            active = True
        else:
            active = False
        student = students.objects.create(
            name = name, city = city, level = level, date_admitted=date_admitted, active=active, reg_no=reg_no
        )
        return redirect('student_views')
    return render(request, 'first_model/add_student.html')
Save all files and start the server and then go to the address 127.0.0.1:8000/add_student. Fill in the details as shown below and submit.

visit this git repo to download the source code. That's it for today and I hope you have learnt one thing or another. Thank you for reading.